How to fix "texture streaming pool over budget" warning in Unreal Engine?

Let's start with what not to do:
Do not increase texture pool size!
This will damage your game performance. Many tutorials suggest this, but it only removes the warning, the texture issues stay. You can only increase the pool so far before you start running out of GPU memory. With this "fix" players who use lower spec hardware will see blurry textures. If you continue down this path, blurry textures can appear even on high-end hardware, too.
Do this instead
When the warning message appears, there are likely issues with your textures. Here is how you can resolve them.
In Unreal Editor, go to Tools -> Audit -> Statistics
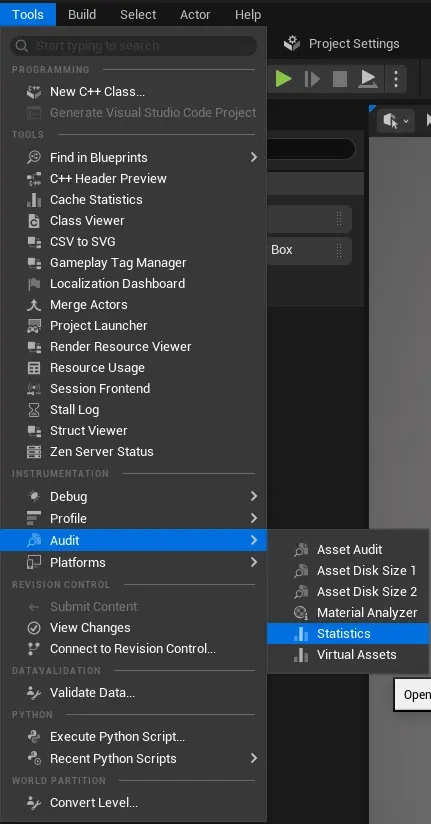
Open Texture Stats
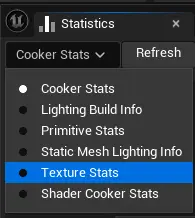
Sort by Current Memory

Now you can see a list of textures. Great!
The ones at the top of the list take the most memory. They are the most significant problems, so you should prioritize those.

Correct the texture sizes
This is the most critical point. If this one is not completed, many of the points below will not be applicable.
Powers of 2
The only acceptable texture sizes are: 1, 2, 4, 8, 16, 32, 64, 128, 256, 512, 1024, 2048, 4096, 8192. They do not have to be square, but each edge needs to be precisely one of those sizes.
We can see that this is not the case for our first two textures.
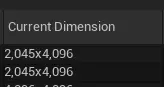 Their size is 2045, not 2048. This is why they take so much space; generating mips (those are like texture LODs) is not possible. This is why the entire texture has to be constantly loaded, not just the required mip.
These textures need to be resized in image editing software outside of Unreal, then reimported.
Generate the mip maps
This is only possible if the previous step was completed. On the right, you have a path to the texture. Let's open it.
In the texture window, make sure that Mip Gen Settings are set to FromTextureGroup. For the Texture Group, you can choose one appropriate for your texture. For this one, I set World.

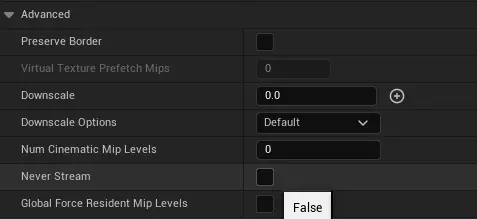
Enable streaming
In Level Of Detail -> Advanced, ensure that Never Stream is set to false.
Enable compression
In the Compression panel, make sure that your texture is compressed.
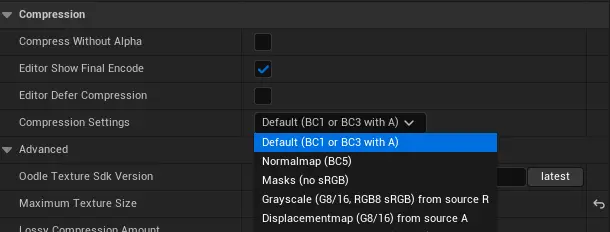
For most textures, Default (BC1 or BC3 with A) will be sufficient. For normal maps, select Normalmap (BC5). For grayscale textures, you can use Grayscale (G8/16, RGB8 sRGB) from source R.
Reduce texture max size
After you went through textures and completed the last steps, that might have already been enough, but here is another tip to take it further: reduce maximum texture sizes. In Compression -> Advanced, there is a field called Maximum Texture Size. This way, you can limit very high-resolution textures, where such detail is not needed.
 For example, you can reduce a
 4096x4096 texture to a max size of 2048x2048 or even 1024x1024.
Key takeaway
Always optimize textures first. Consider increasing the pool size only as a final step, not a primary fix.
Command is r.Streaming.PoolSize SIZE_IN_MEGABYTES
What's next?
With those fixes, your warning has hopefully disappeared. At FPS Fish, we are creating tools to detect texture issues like this early, even before they become a problem.
Unreal performance is hard, we make it easy. Click to try out FPS Fish